Desktop App
Andrew Pareles (@Kubester)
This post is about some of the thinking that went on behind the scenes to build our desktop app.
Desktop App Modes
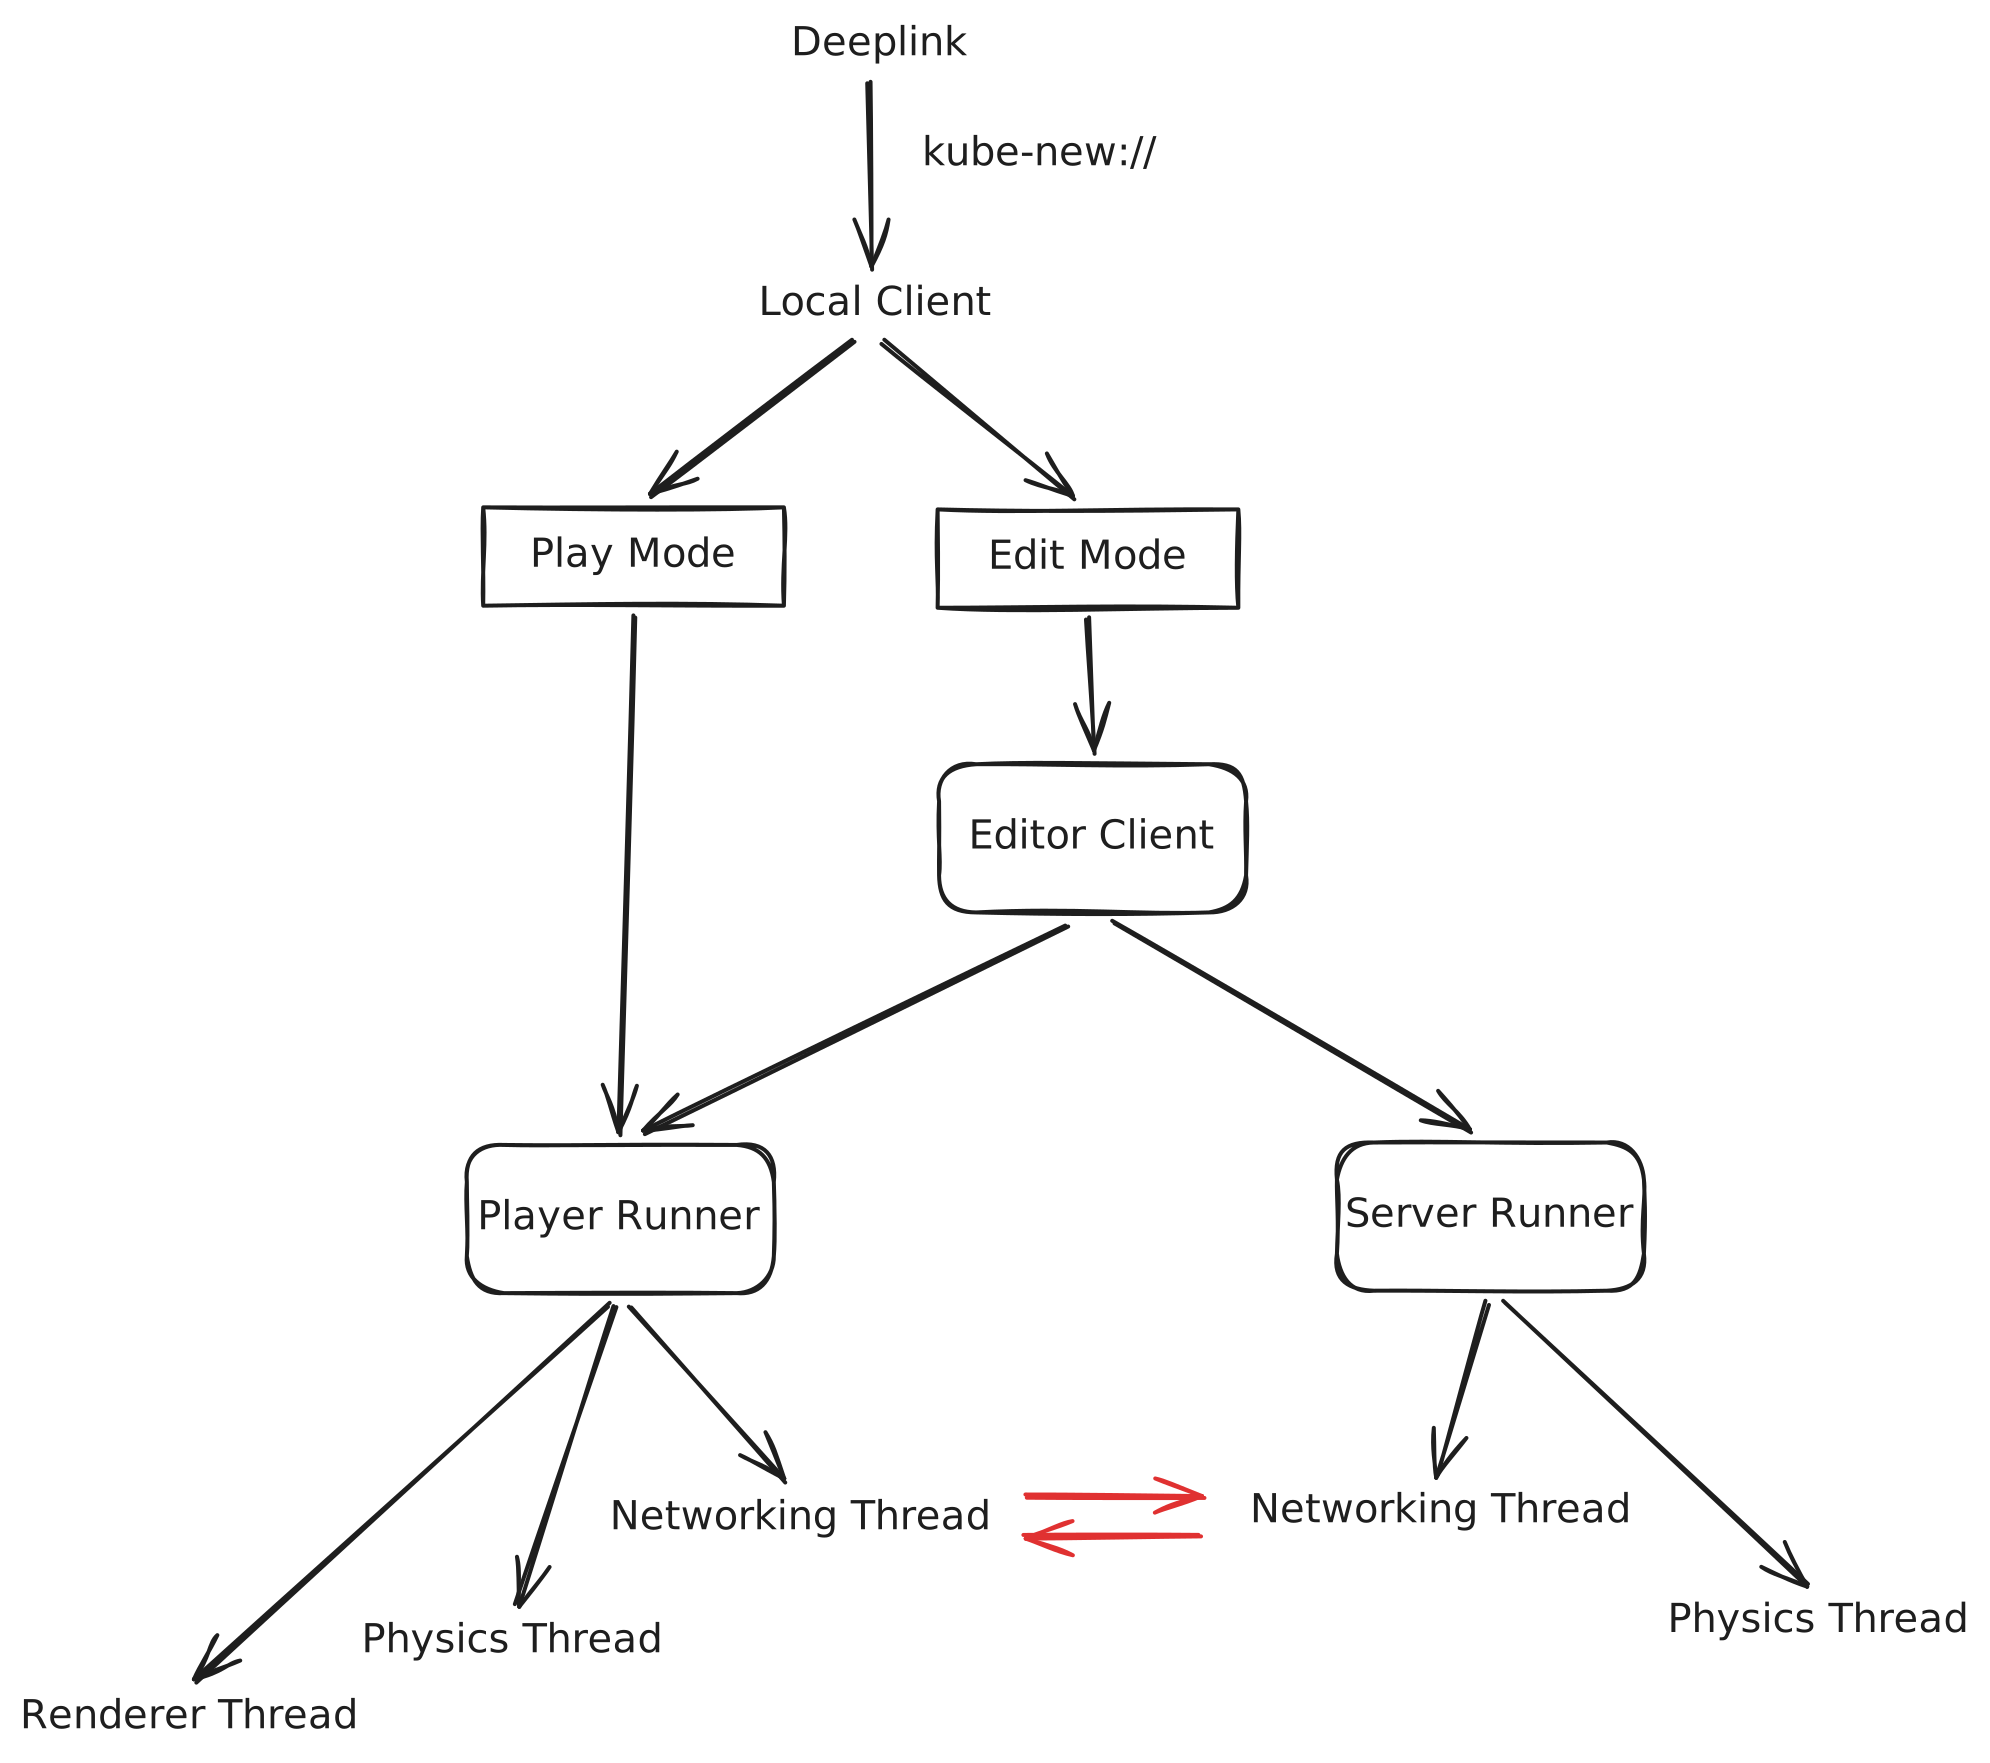
There are two modes the app can run in: Edit or Play. To launch the app in one of these two modes, the website simply redirects you to the deeplink kube-new:// with some parameters.
Here is a dependence tree of the desktop app and the different modes.
-
Play Mode: you run Play Runner and connect to a server running Server Runner.
-
Edit Mode: you run your own local Play Runner and Server Runner when you playtest.1
In the image, you can see that the Physics Thread and the Renderer Thread are separate. This is the most interesting part about the desktop app.
We built a separate renderer thread so we can display the game at eg 240fps+, even though the physics only steps at 60fps.
Interpolation is what gives rise to higher framerates. To get a high framerate, all we need to do is make the renderer thread interpolate between the snapshots that the physics thread gives it:
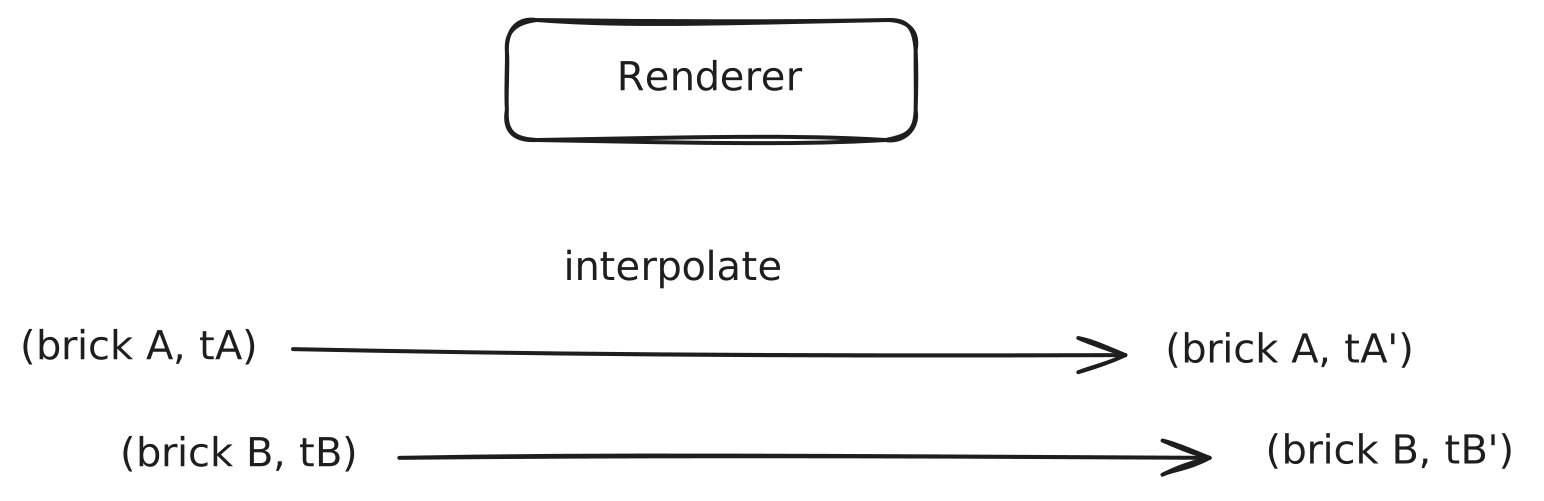
By default, we interpolate each object's position and velocity between the two most recent snapshots (using Hermite polynomials). But if animations are involved, we also make interpolation account for the animator's preferences (you can pick a style, eg stop-motion). We also make interpolation recompute skeletons per frame, not just per physics tick, so that they appear high-framerate. Interpolation is built into our custom shader logic, so it also works when animating shadows, texture sizes, etc.
Footnotes
-
The AI can also do this in headless mode. ↩